
Published Date:
Description
Need to get your device connected to Wolverine-WiFi? You’ve come to the right place! Below you will find basic connection instructions, articles for resolving issues, and information about our networks.
For the best experience, please disable MAC randomization on your device if applicable. There will be an article with instructions on how to do this listed under Related Articles.
Solution
Connect to the Desired Wireless Network
Connect to Eduroam (Instructions for macOS)
Connect to the Wireless Network and Run the SecureW2 Installer
Please note, there are ongoing issues with some devices when registering to Eduroam. You can read more about it here: (while this article is geared towards Android devices, these issues are being experienced on other platforms such as MacOS and iOS.)
-
Select the open network named “Wolverine Wi-Fi.”
-
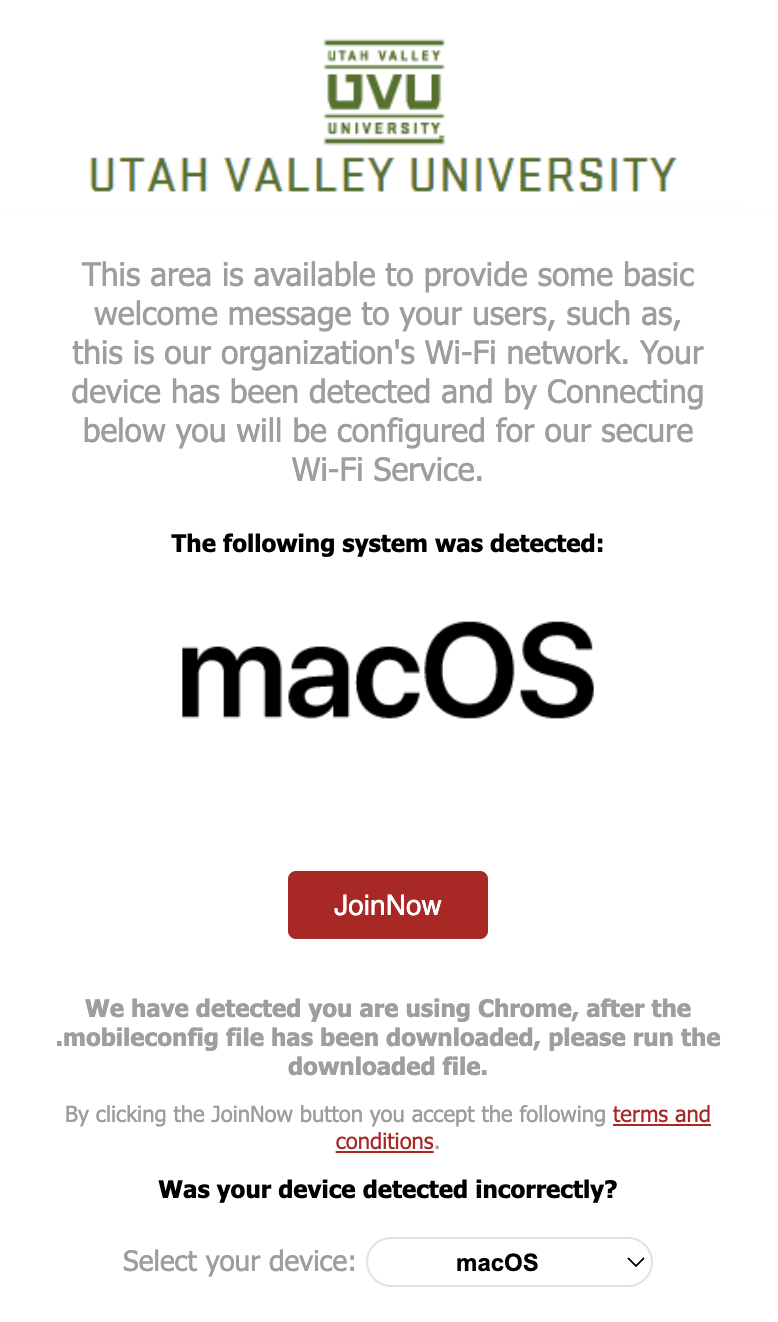
Go to the following link: https://cloud.securew2.com/public/72227/eduroam-profile/
-
If you are experiencing issues with this step, follow the Eduroam documentation for your device type. https://kb.uvu.edu/servicecenter/how-to-connect-to-wolverine-wifi
-
-
This will take you to our SecureW2 site. Click JoinNow to download the SecureW2 profile.
-
Open the downloaded file. You should then see a notification from System Settings letting you know that the profile is ready to be installed.
-
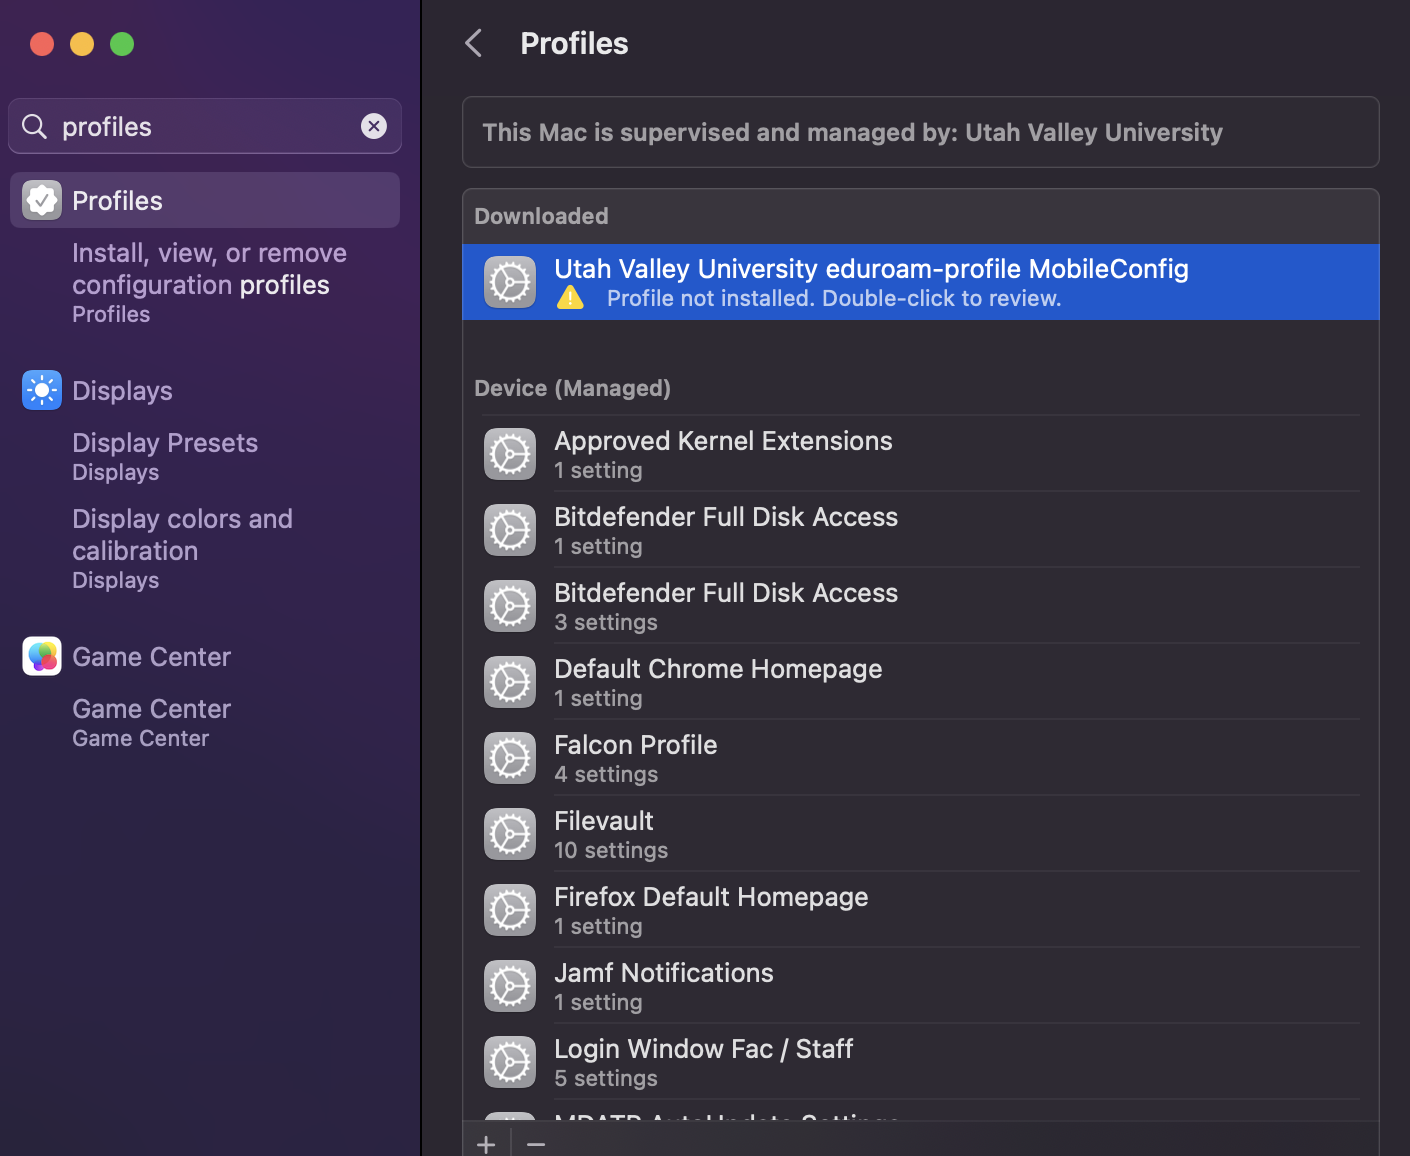
To install the profile, navigate to System Settings and search for Profiles. Under Downloaded, double-click the Utah Valley University eduroam-profile MobileConfig.
-
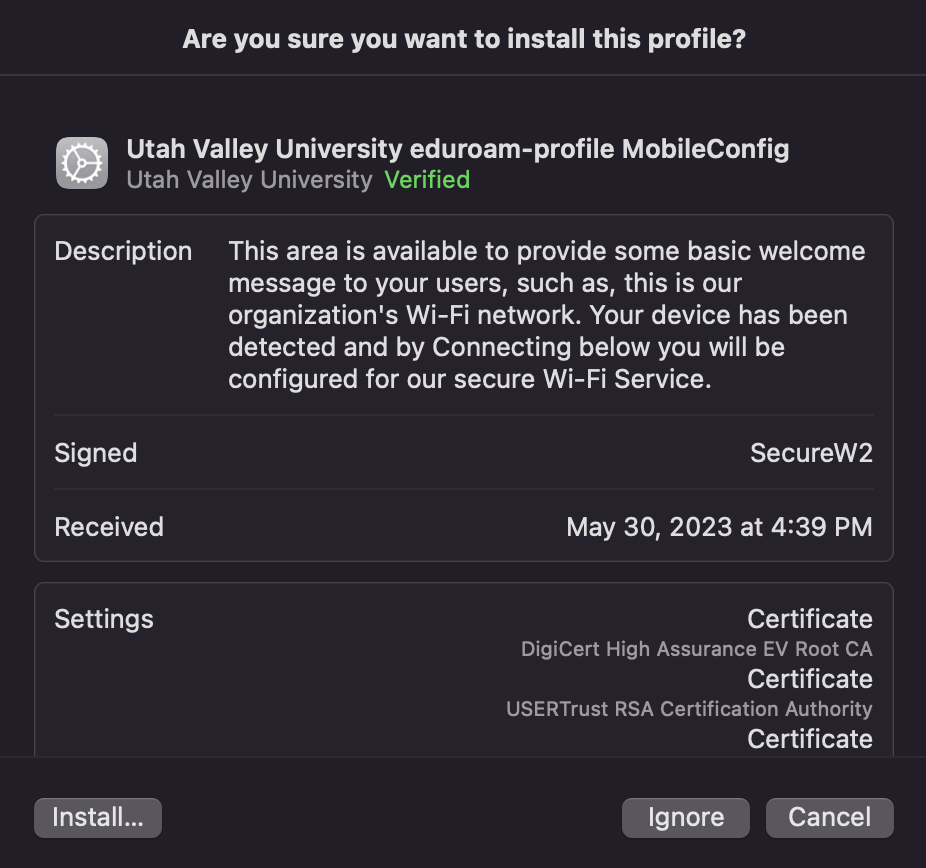
Select the Install button in the window that appears. Following this, you will be prompted once more to confirm the install and then asked to enter your macOS user password.
-
Go to a new browser tab and try connecting to my.uvu.edu. You should now be able to access that webpage and have full internet access on Eduroam.
Connect to Eduroam (Instructions for Android)
Connect to the Wireless Network and Run the SecureW2 Installer
Please note, there are ongoing issues with some devices when registering to Eduroam. You can read more about it here.
-
Use our open network named “Wolverine Wi-Fi” or your phone’s cellular network. Go to the Connecting to Eduroam Wi-Fi webpage and tap “Device Configuration Wizard.”
-
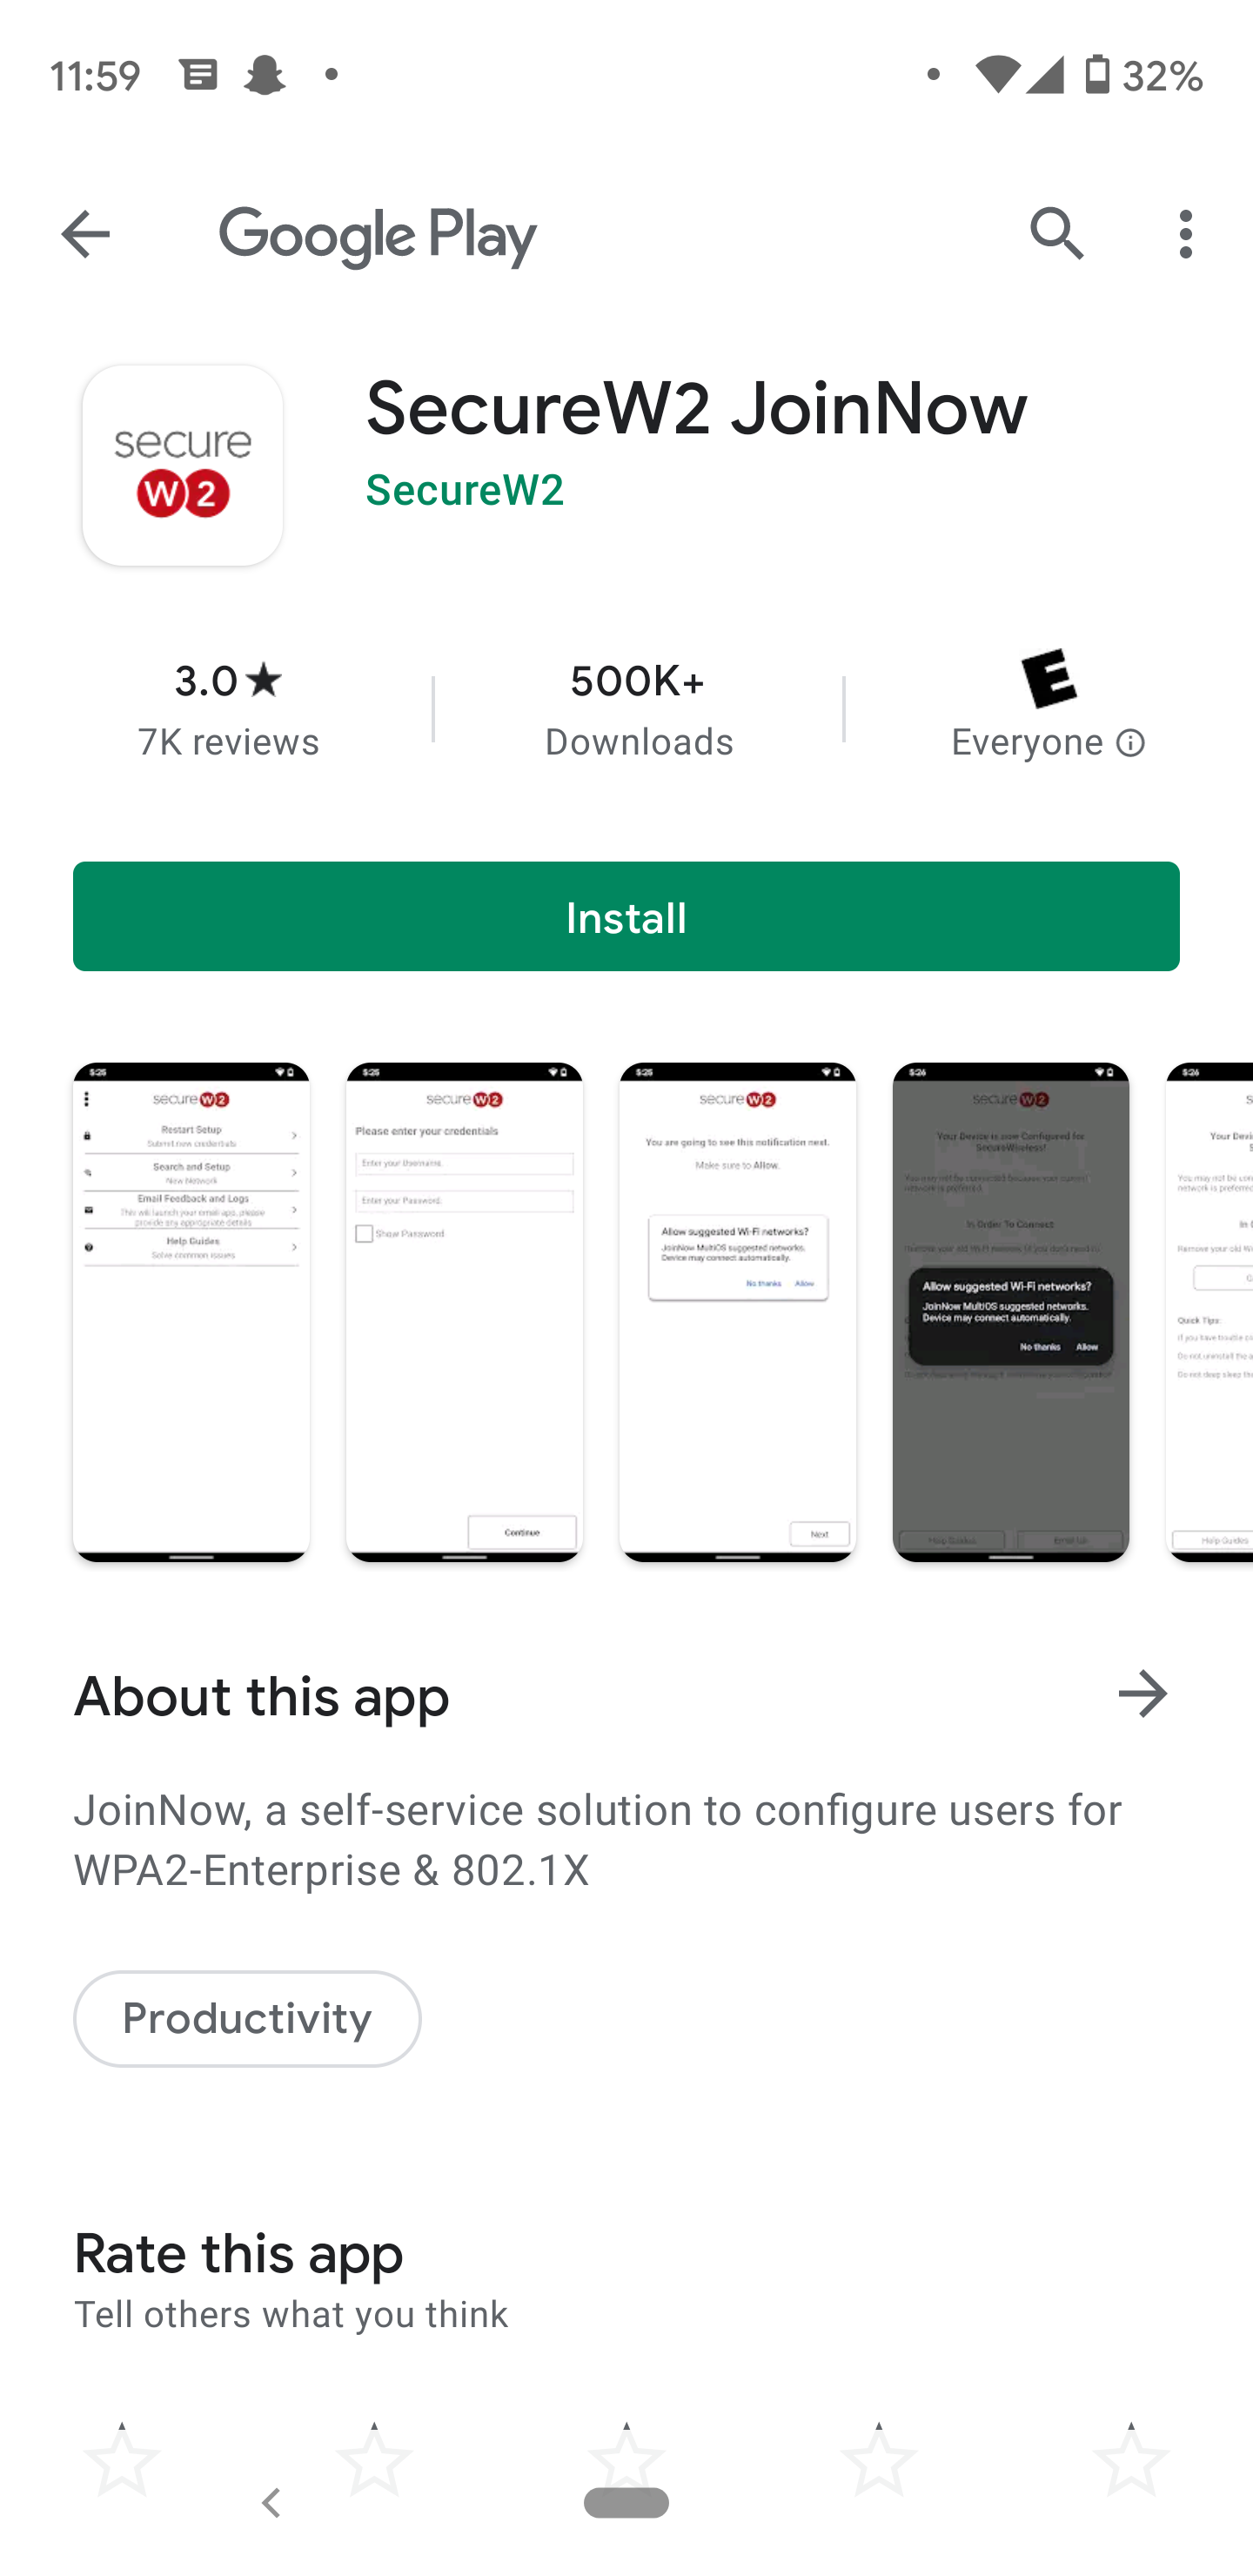
This will take you to our SecureW2 site. Tap Download to go to the play store and install the JoinNow app by SecureW2.
-
Go through the setup dialog using your UVID and password to log in.
-
SecureW2 will finish its setup and connect your device to Eduroam.
-
Go to a new browser tab and try connecting to my.uvu.edu. You should now be able to access that webpage and should have full internet access on Eduroam.
Connect to Eduroam (Instructions for iOS)
Connect to the Wireless Network and Download the SecureW2 Profile
Please note, there are ongoing issues with some devices when registering to Eduroam. You can read more about it here: (while this article is geared towards Android devices, these issues are being experienced on other platforms such as MacOS and iOS.)
-
Use our open network named “Wolverine Wi-Fi” or your phone’s cellular network. Go to the Connecting to Eduroam Wi-Fi webpage and tap “Device Configuration Wizard.”
-
This will take you to our SecureW2 site. Tap Sign in and enter your UVID and password when prompted.
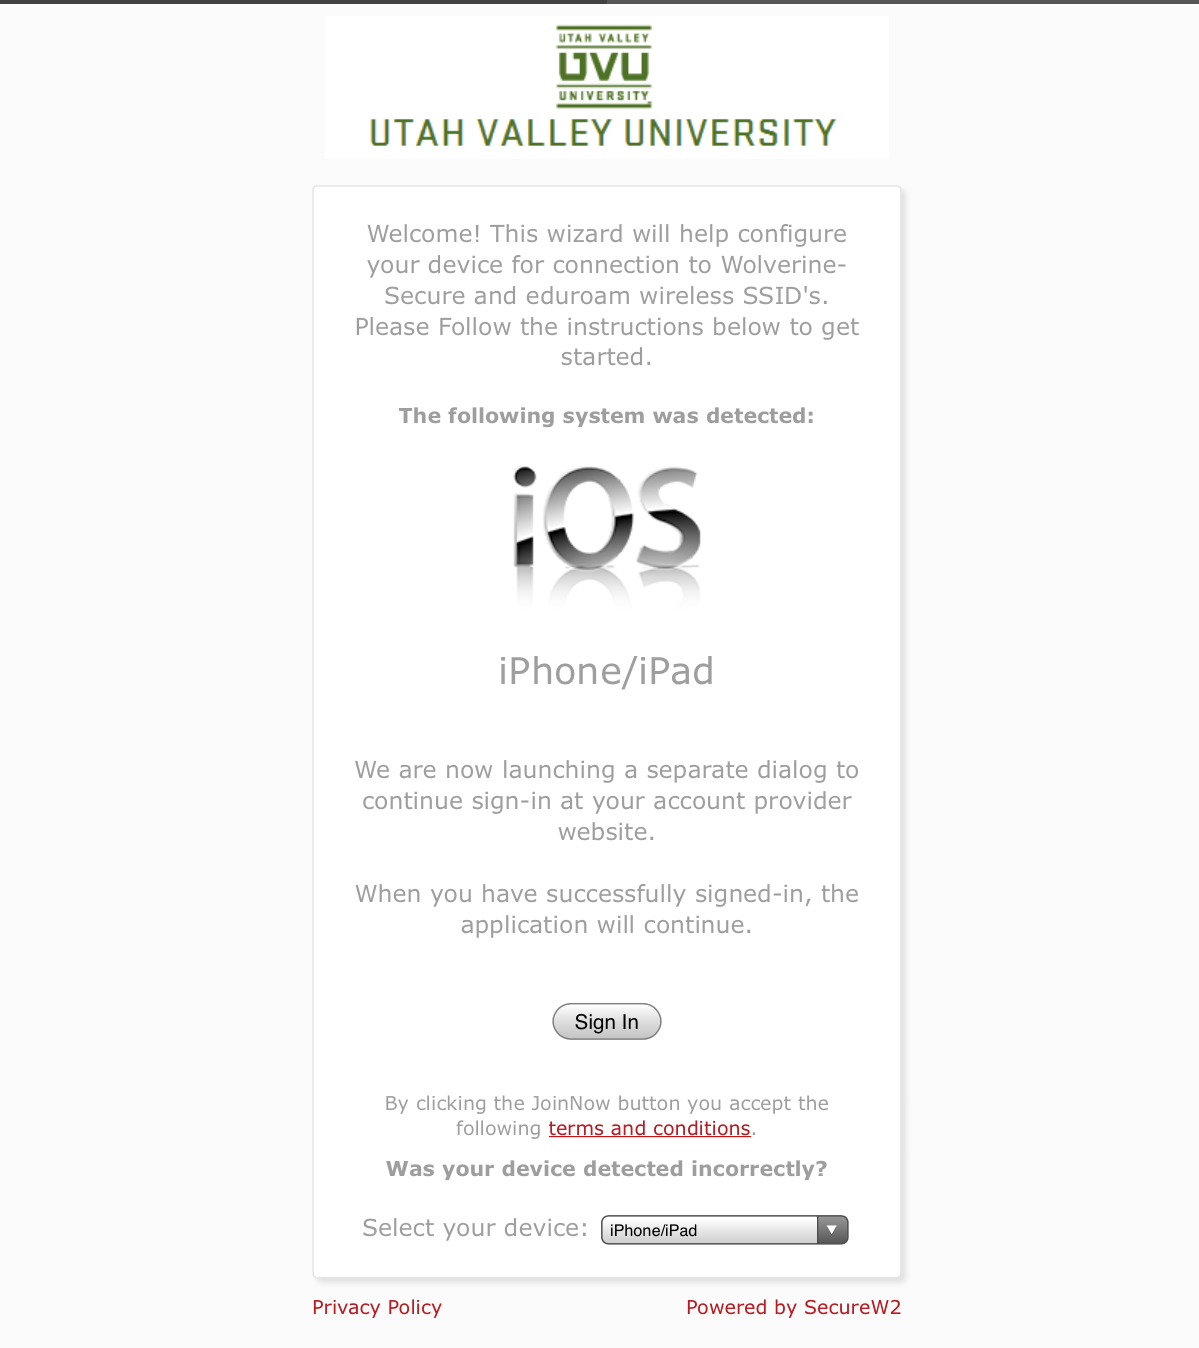
-
You will be redirected back to the SecureW2 site after successful login. Tap JoinNow.
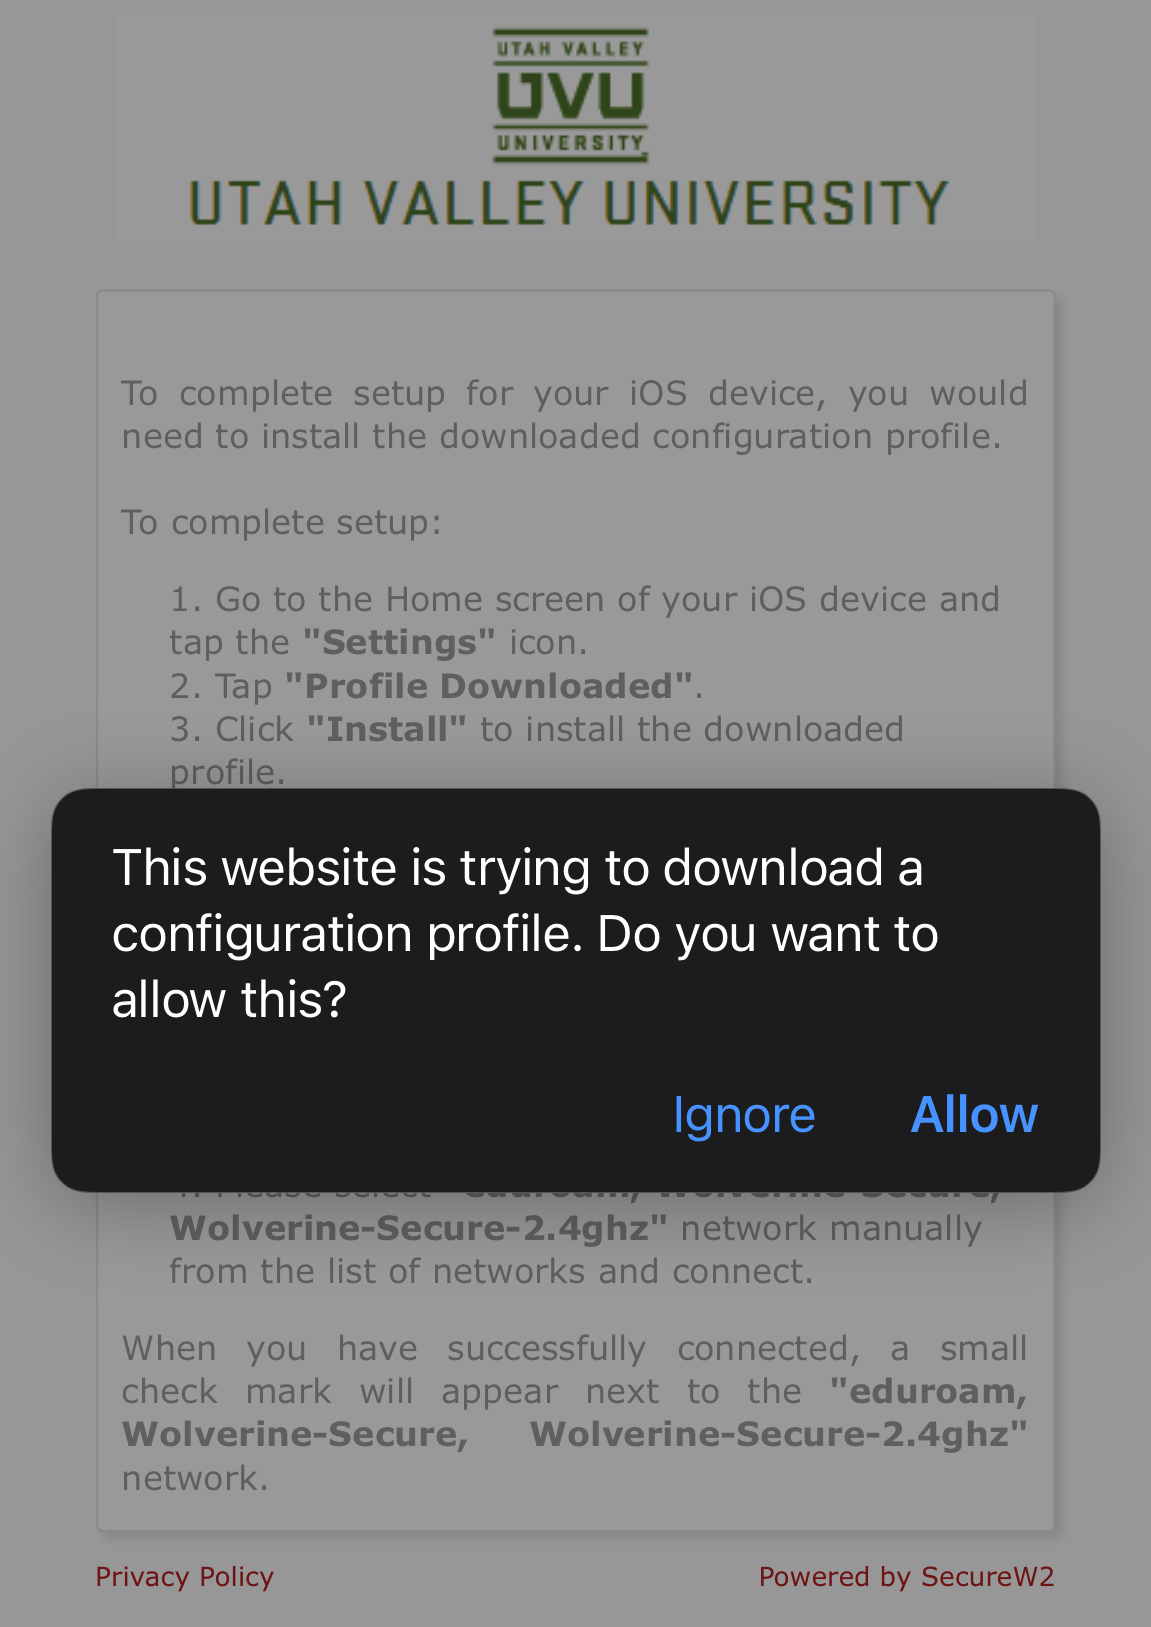
-
You’ll be prompted to download a configuration file. Tap Allow.
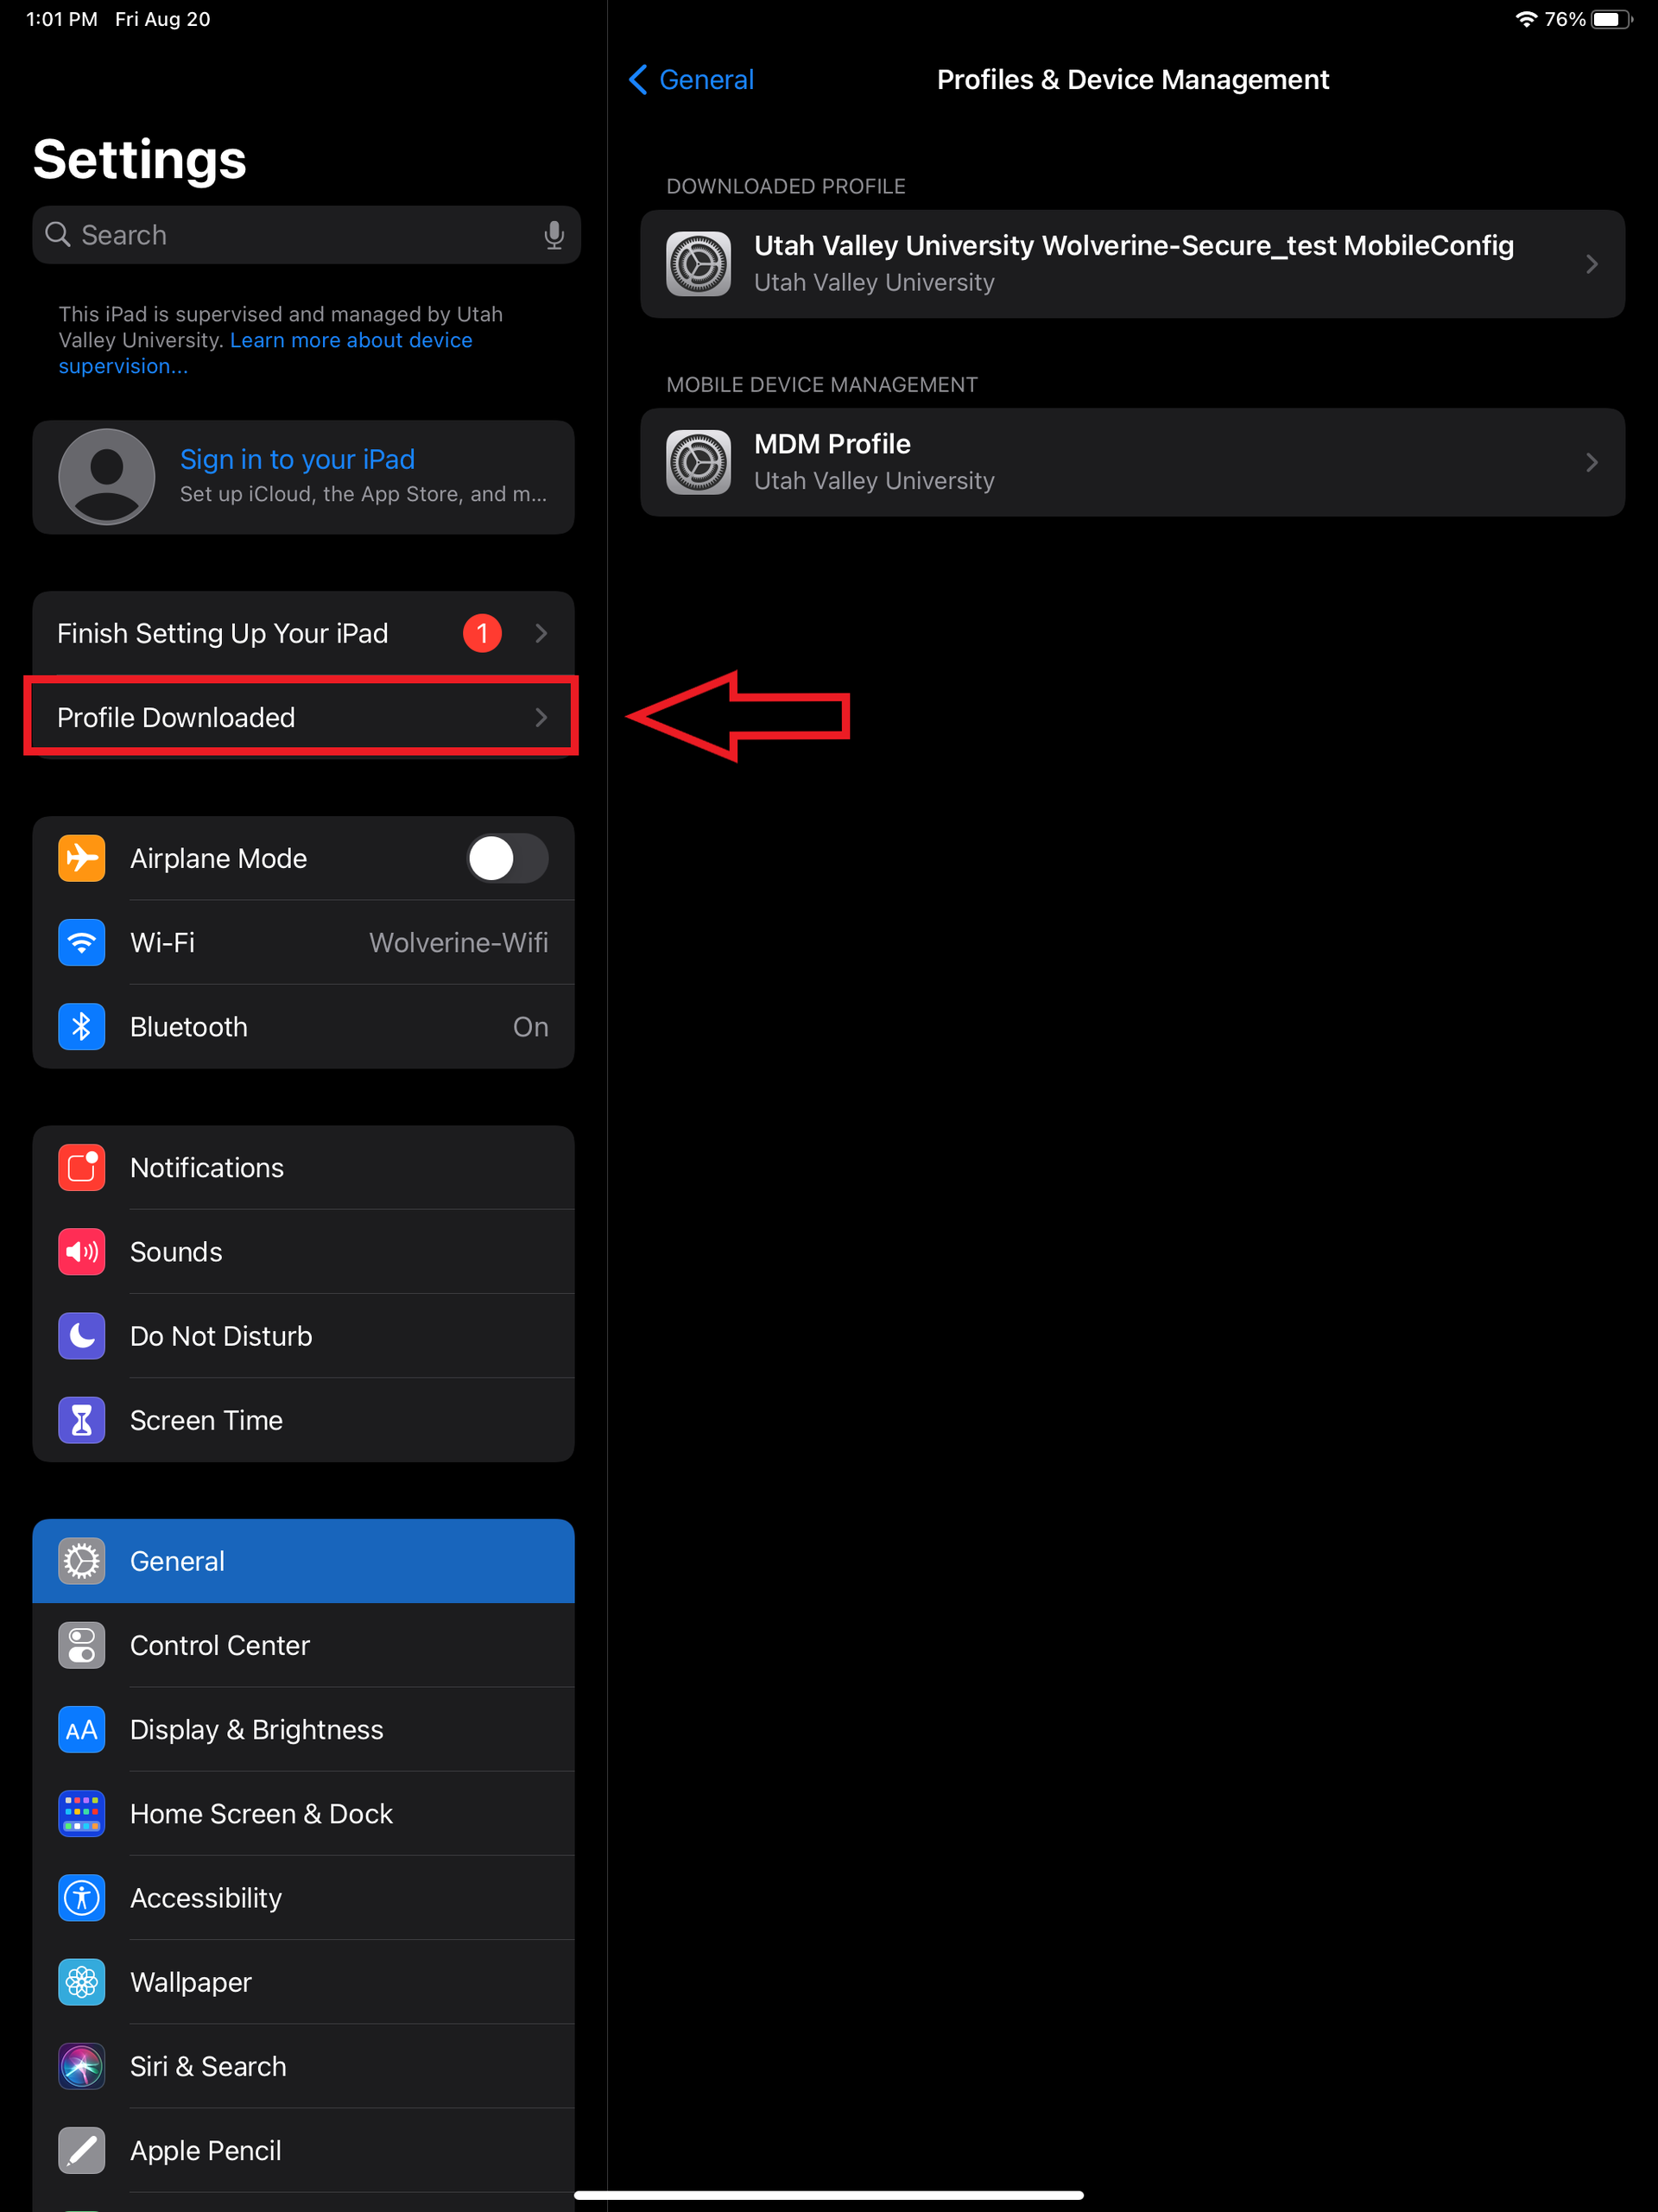
Install the Secure W2 Profile and Disable the Private Address Feature
-
Go to the Settings app on your device and tap Profile Downloaded.
-
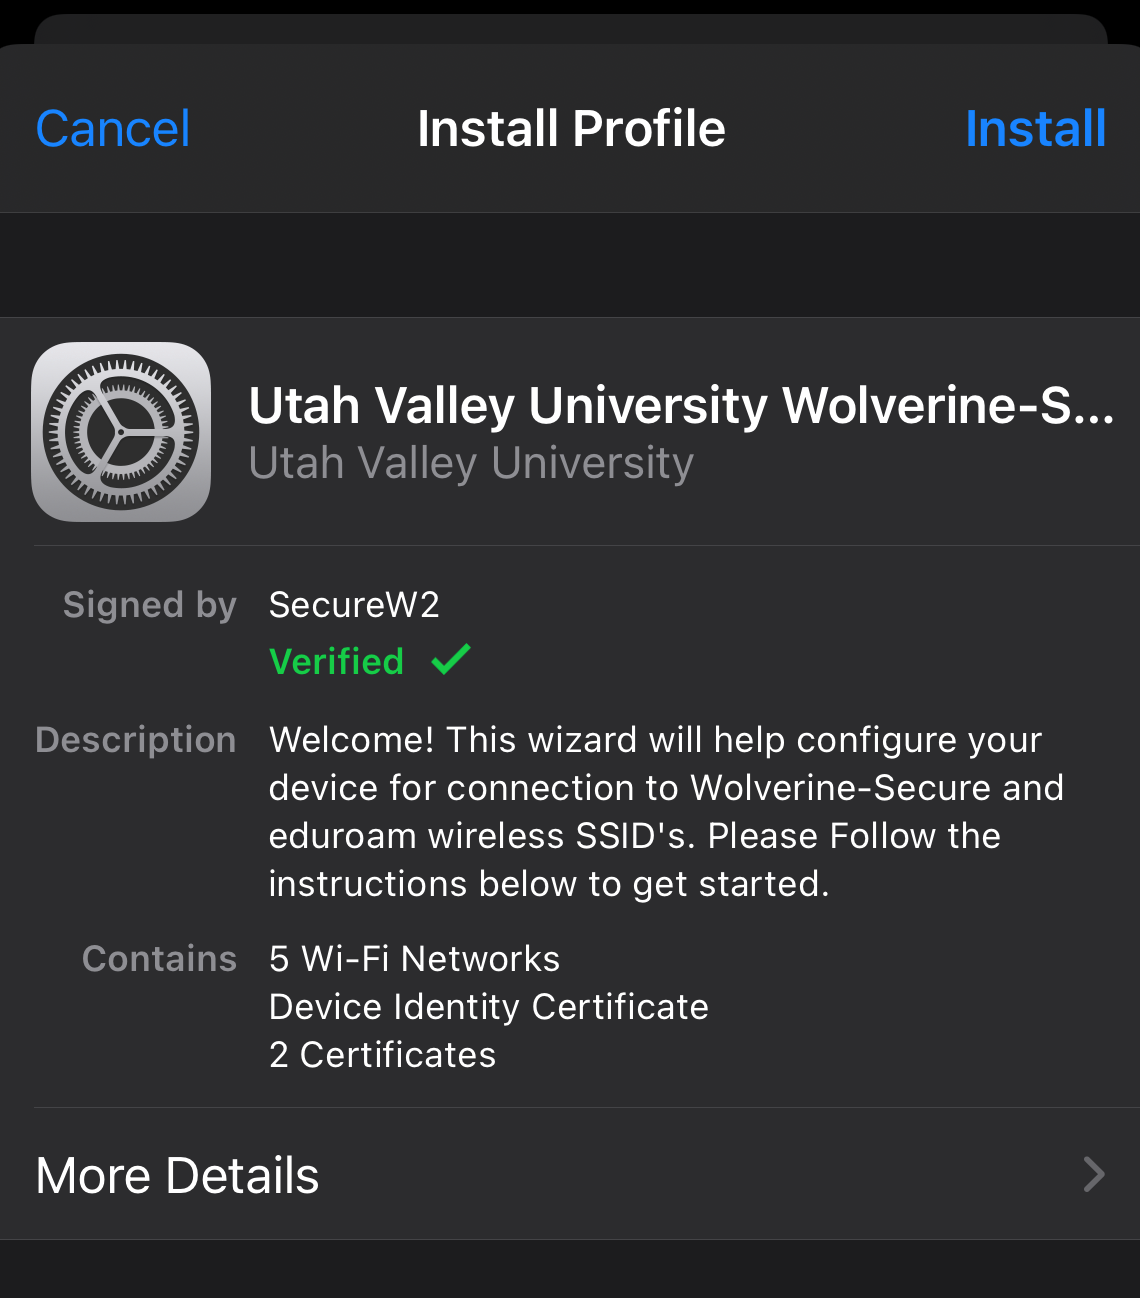
Then tap Install.
-
In the Settings app, go to Wi-Fi and select Eduroam.
-
Locate the Eduroam network and tap the i icon.
-
Turn the Private Address button to the “off” mode.
-
When prompted, tap Rejoin to rejoin the network.
-
Go to a new browser tab and try connecting to my.uvu.edu. You should now be able to access that webpage and should have full internet access on Eduroam.
Related Articles
Contact Support
If you could not resolve your issue using the provided solution, please contact the Service Desk.