
Published Date:
Description
Inspire (a Civitas Learning application) allows an advisor-type user to build student groups based on filter criteria set by the user. This tutorial teaches how to build a dynamic group in Inspire. Dynamic groups update automatically every day to add new students to the group who meet the criteria set by the group’s filter. Dynamic groups also remove students who no longer meet the filter criteria.
In order to use the dynamic group feature, a user MUST have an advisor-type user role in Inspire. To request access, please follow this guide. To learn more about dynamic groups go to the Help Center within Inspire and type Groups in the search field.
Solution
Log in to Inspire and Create a Dynamic Group
-
Log into Inspire by selecting LOGIN WITH NETID from the Inspire login page. Use UVU credentials to log in.
-
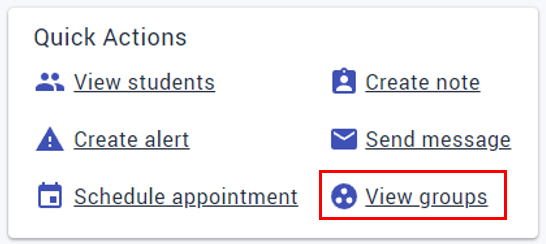
On the homepage, select View Groups from the Quick Actions area. This will direct you to the My Custom Groups page.
-
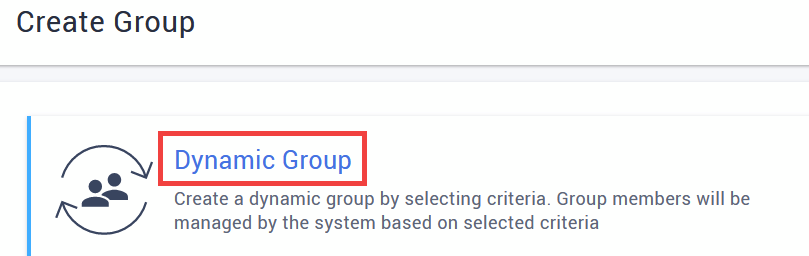
On the My Custom Groups page, select the Create Group button.

-
Select the Dynamic Group option on the Create Group page.
-
Type in the name of the group in the Group Name field.

-
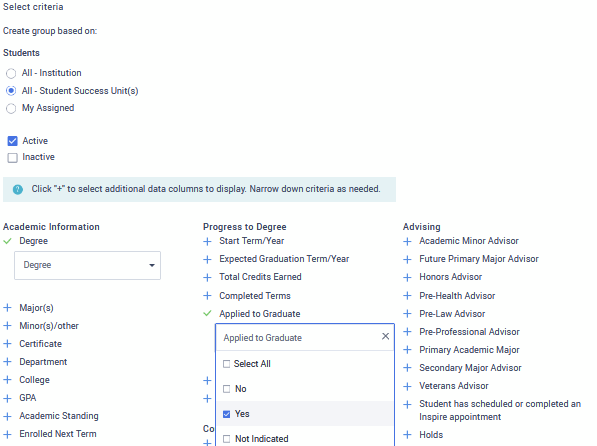
Below the Group Name field, scroll down to the Select Criteria section. This section lists all available filters which can be used to create dynamic groups. The filters you select in this section will control which students will be automatically added to (or removed from) the group by the system.
-
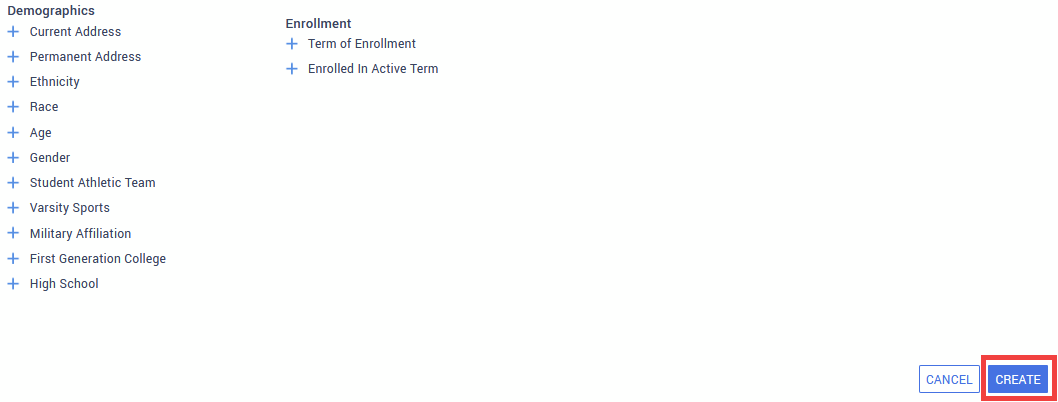
When all the filters have been set, select the Create button below all the filter options. This will send you back to the My Groups page.
-
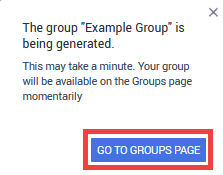
A pop-up box will let you know your group is being generated. Select Go to My Groups to close this box. It may take a few minutes for the group to build. While the group is being built, the message generating group will appear in the Number of Members column of your new group.

-
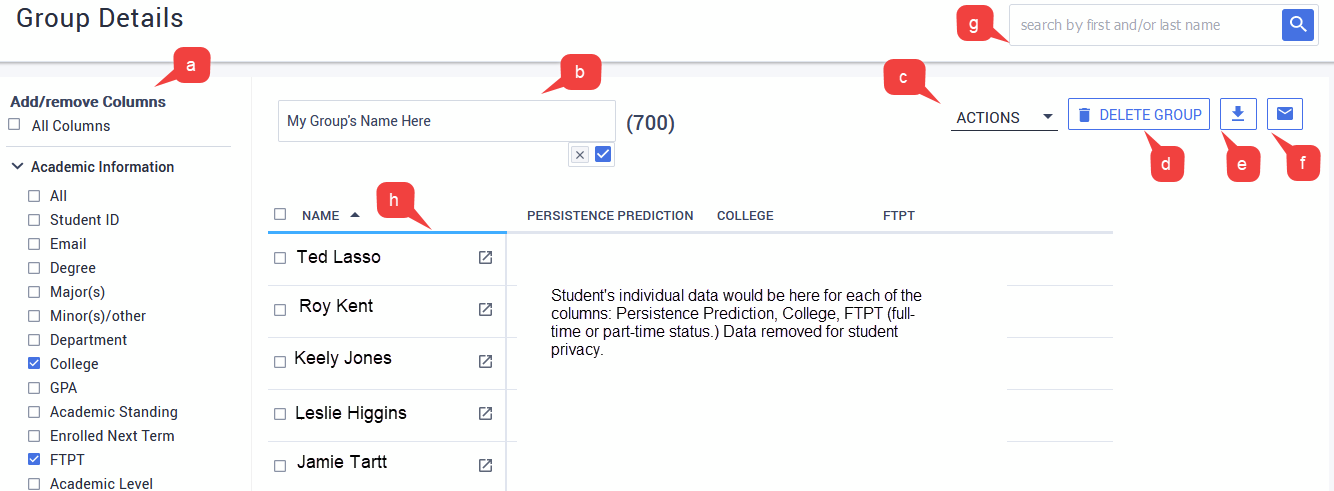
Once the group is built, the Number of Members column will show the number of students currently in the group. Once built, you can access the student information by selecting the group from the My Custom Groups list. This will take you to the Group Details page.
-
There are a number of actions you can perform with a group on the Group Details page. See the details below for a description of the different actions.
-
Add/remove the columns of student data that appear in group details. You can set the standard columns you wish to see by selecting the Save Column/filters option from the Actions drop-down box (part c).
-
Change the group’s name.
-
Select the Actions box to either edit the filter criteria of the group or save the columns selected.
-
Delete the group.
-
Download the information of all students or selected students to an Excel Spreadsheet.
-
Email all or the selected students in the group.
-
Search for a specific student in the group by first and/or the last name.
-
Access a student’s Inspire profile by clicking on the student’s name from the Name column.
-
Related Articles
- How Do I Create a Dynamic Group in Inspire
- How to Use Engagement Opportunity for Students With More Than a 5% Drop in Persistence Prediction in Last 7 Days
- Uploading Student Lists to Inspire
- What is Civitas and How Do I Get Access?
- How to Create an Athletics/Team Report in Inspire
- How Can I Remove a Student from an Engagement Opportunity Once the Opportunity Has Been Addressed?
Contact Support
For any issues or questions regarding Civitas or Inspire please submit a request to the Academic IT and Analytics Team through the UVU Service Center Portal.
If you are experiencing any other issues, please contact the Service Desk.