
How to Set Up Meeting Invites in Outlook
Published Date:
Description
Learn how to set up or schedule a physical in-person meeting or virtual Microsoft Teams Meeting using the Outlook Calendar.
Please review the Microsoft Office 365 software page for more information on installing Office 365 along with Teams on your work or personal device if it is not already installed.
Solution
Select the Desired Meeting Invitation Type
There are two types of meeting invitations available in Outlook:
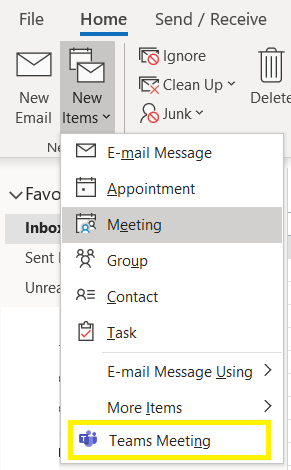
The first type is a physical in-person meeting, which can be found under “New Items” and select “Meeting” (in grey below).
The second type is a virtual Microsoft Teams Meeting (using your computer’s video and microphone), which can be found by navigating to “New Items” and selecting “Teams Meeting” (highlighted in yellow below). The main difference is that the Teams Meeting will set the location as Microsoft Teams Meeting and will include links to join the meeting.
Please select the meeting type most appropriate to the situation. As a courtesy rule of thumb, if one person needs to be in the meeting virtually, all should be virtual, so they can all participate equally.
Fill Out and Send Your Meeting Invite
After selecting the type of meeting, enter the meeting information details:
Both meeting invitation types have the same fields and options (pictured below):
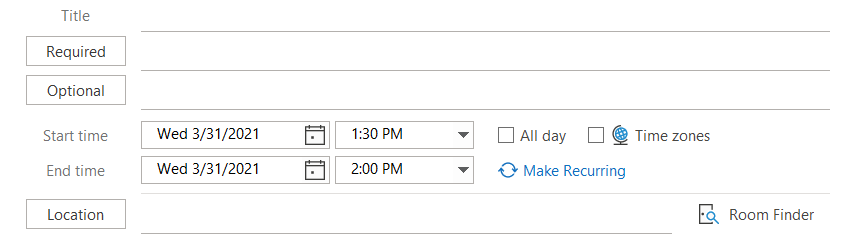
Fill out the Title field with the name of the meeting. If a Title is not entered before the sender clicks Send, a pop-up will appear to remind them to set a Title. Invitations can be sent without a Title, but that is not very useful to the participants in the meeting.
In the Required field, enter the names of essential or required attendees.
In the Optional field, enter the names of individuals that should be notified of the meeting so they can attend if they want to.
Set the Start time and End time to the desired time of the meeting.
The organizer or sender of the meeting should use the Scheduling Assistant to avoid schedule conflicts between the participants. The Scheduling Assistant menu is found on the menu of the invitation:

Selecting the Scheduling Assistant will change the view of the meeting to show all the participants and what their schedules are:
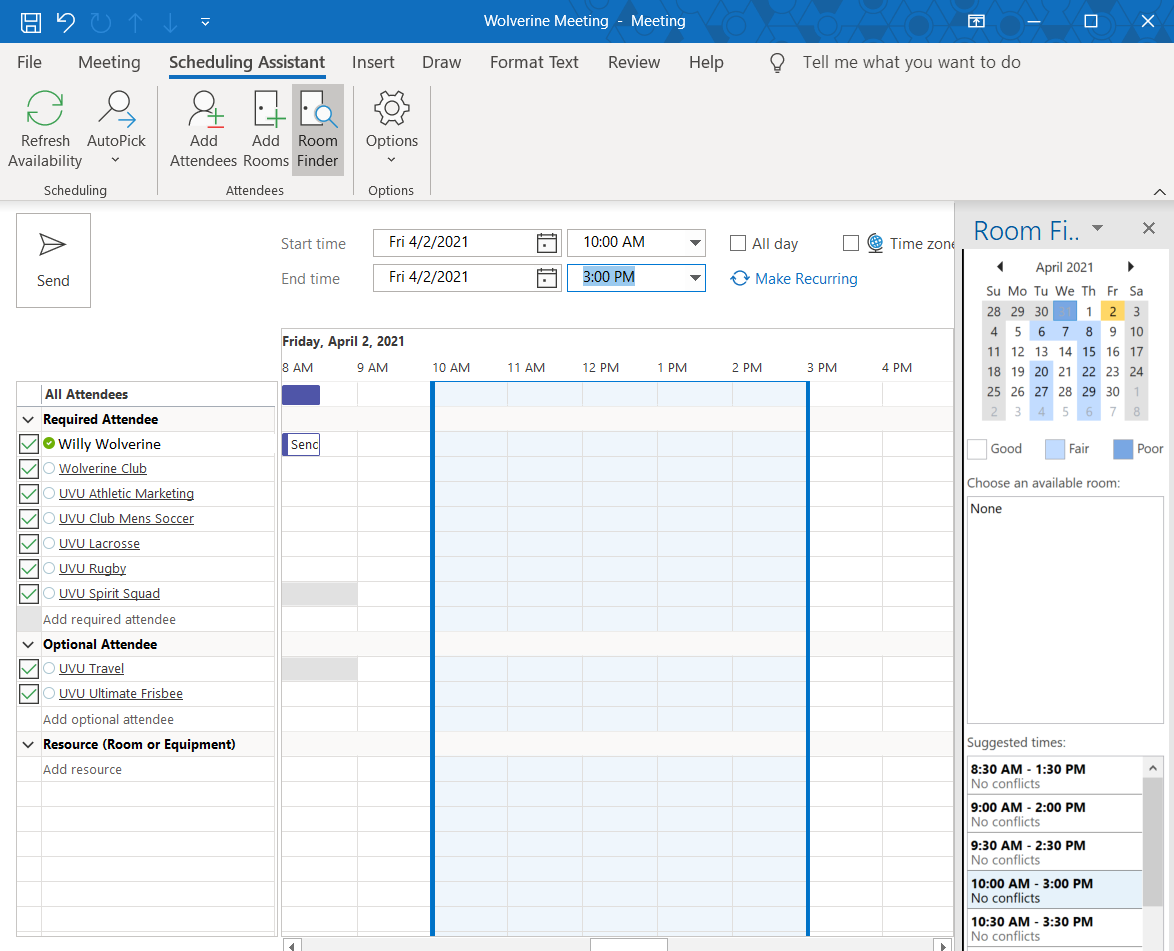
Once a time for the meeting has been chosen, select meeting on the menu next to Scheduling Assistant to go back to the main view.
In the Location field, enter information about the conference room or other location where the meeting will take place.
The Teams Meeting invitation will default the location to Microsoft Teams Meeting.
To change the default, type an entry (My Office, UCCU Center, Home, etc.). If a conference room is on the Exchange system, you can click on the Location button to get a list of conference rooms. Not all rooms are scheduled through this system, so not all rooms can be scheduled here. If a Location is not set before the sender clicks Send, a pop-up will appear to remind them to set a Location.
Press the Send button to schedule the meeting and send invites to all attendees.
Related Articles
- How to Disable Auto-Generated Teams Meeting Links in Outlook
- How to Set Up the Microsoft Authenticator App
- How to Send an Outgoing (Internet) Message with Encryption
- How to Set Up an Auto-Reply Message in Outlook
- How to Cancel or Reschedule Outlook Meetings Organized by Someone Else
- How to Set Up Meeting Invites in Outlook
Contact Support
If you could not resolve your issue using the provided solution, please contact the Service Desk.