How to Share a Subfolder in Outlook
Published Date:
Description
Learn how to share a subfolder in Outlook. Subfolders can be shared with anyone in our email system.
Solution
Share Subfolder Within the Outlook App
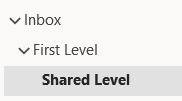
Ensure the folder you want to share has been created and is no more than two levels from your Inbox (e.g., Inbox\First Level\Shared Level).

Right-click on the folder you want to share (in the example above, “Shared Level” is the folder) and select Properties. This will open the Properties window.
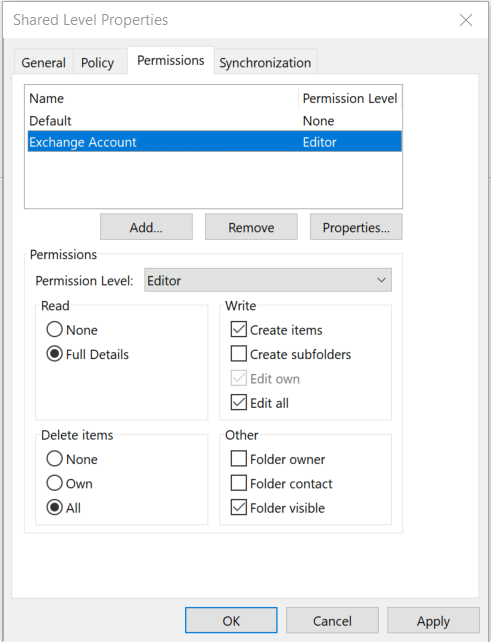
Select the Permissions tab on the Properties window.
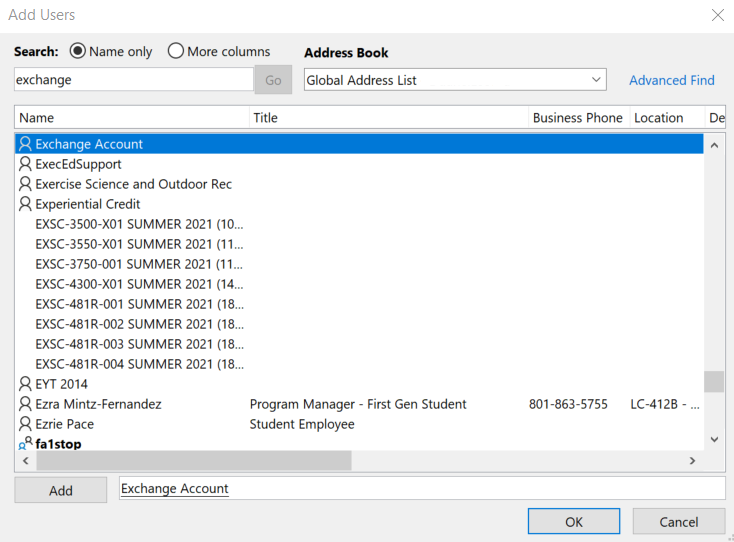
Click the Add button to search the address book for the person you want to share the folder with. Once you find that person, double-click on their entry or click the Add button to list them at the bottom of the Add Users window. You may add more than one person at a time. Once you have added everyone you want to the Add Users window, click OK.

If granting the permissions to an individual, set the Permissions Level you want them to have for this folder (the Editor level is set in this example). If granting the same permissions to a group, Ctrl left-click all the desired names to select them and set the Permissions Level you want them to have for this folder.

Now that the permissions are set on the folder, you have to make the folder visible to the people you shared it with. Check the Folder visible checkbox at each level above the shared folder. In the example above, the Folder visible has been granted at both First Level and the Inbox.
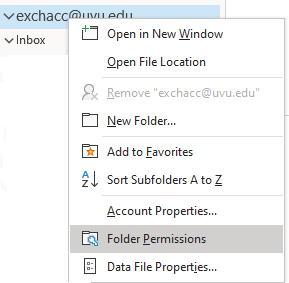
To allow people to see the Inbox level, you have to share at the top account level. Right-click on your email address at the top of your Outlook folders and select Folder Permissions. Then make the folder visible by checking the Folder visible checkbox for the same person or people with whom you shared the folder.

To complete the sharing process, the person or people you have shared with must go to their Outlook client and select File → Open & Export → Other User’s Folder, then put you in the Name entry and leave the Folder type as Inbox. This will add the folder on the left-hand side of Outlook for them to see your folder.
Related Articles
- How to Disable Auto-Generated Teams Meeting Links in Outlook
- How to Set Up the Microsoft Authenticator App
- How to Send an Outgoing (Internet) Message with Encryption
- How to Set Up an Auto-Reply Message in Outlook
- How to Cancel or Reschedule Outlook Meetings Organized by Someone Else
- How to Set Up Meeting Invites in Outlook
Contact Support
If you could not resolve your issue using the provided solution, please contact the Service Desk.
